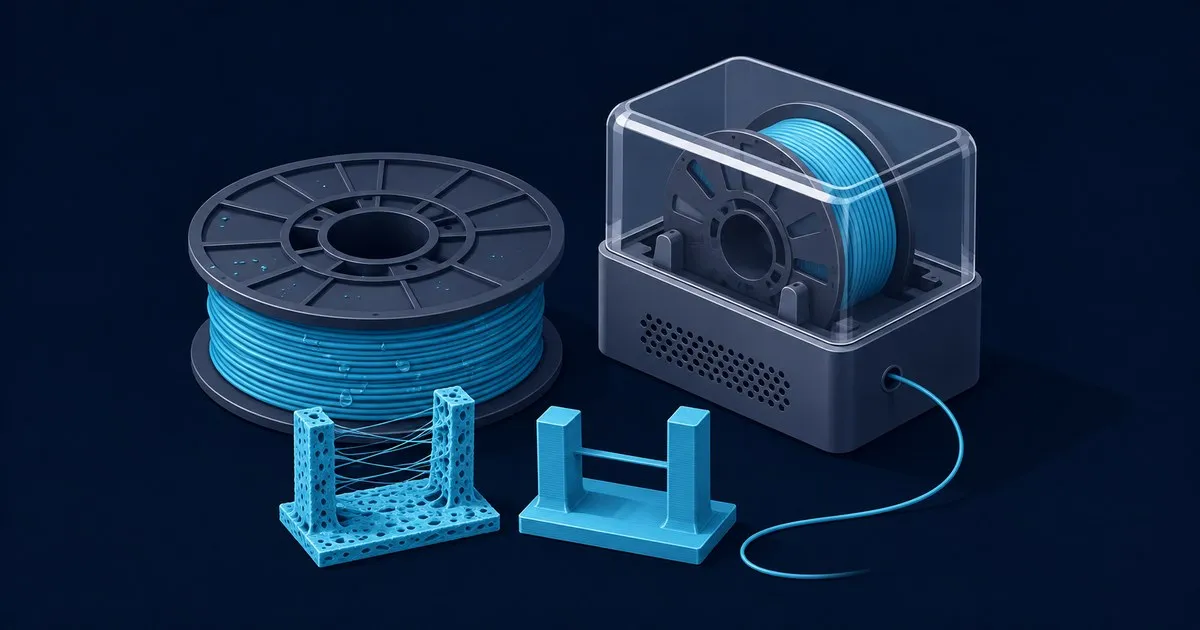
Wet Filament Symptoms and How to Fix Them: PLA, PETG and TPU
Identify moisture-related popping, stringing and pitted walls, use manufacturer drying temperatures, and verify the fix with a repeat print before tuning
For wet filament symptoms and how to fix them, start with popping, pitted walls and increased stringing. Dry the spool at its manufacturer’s settings, then rerun the same G-code before tuning retraction. MatterHackers’ moisture guide documents these symptoms.
Related: PLA vs PETG vs ABS: Which Filament to Use.
What wet filament looks and sounds like
Absorbed water vaporizes inside the hotend, disrupting extrusion. Look for these combinations; MatterHackers also provides wet/dry comparison photos.
| Symptom | What to inspect |
|---|---|
| Popping, crackling or sizzling | Listen at the nozzle during extrusion; note whether the strand also looks irregular. |
| Rough, pitted walls | Look for scattered cavities and uneven extrusion on otherwise plain surfaces. |
| Increased stringing | Compare the same travel gaps against an earlier successful print. |
| Weak layer bonding | Inspect layer separation alongside the surface defects; weakness alone cannot establish moisture. |
Stringing alone is inconclusive. Excessive nozzle temperature, incorrect retraction and plastic stuck on the nozzle can also leave hairs between features. Clean the nozzle using the printer’s maintenance procedure and check the selected filament profile. Prusa’s stringing guidance covers these alternative causes.
A sudden sideways step, with subsequent layers continuing from the displaced position, calls for layer-shift troubleshooting. Check the affected axis, belt tension, pulley security and possible collisions, following Prusa’s layer-shifting guide.
Even sealed nylon can require predrying: check the product instructions. MatterHackers explains this exception.
Drying temperatures: match the filament and the equipment
These are Prusa’s published drying settings, including its Prusament recommendations. They are not universal settings for every formulation bearing the same polymer name.
| Filament covered by Prusa’s guidance | Drying temperature | Duration |
|---|---|---|
| Prusament PLA/rPLA | 45 °C | 6 hours |
| Prusament PETG | 55 °C | 6 hours |
| TPU listed in Prusa’s table | 60 °C | 4–6 hours |
| Prusament ASA | 80 °C | 4 hours |
| Prusament PA11 Carbon Fiber | 90 °C | 6 hours |
Check both the filament instructions and spool heat resistance. Older Prusament spools may need preparation before heating; excessive temperature can soften filament and fuse adjacent windings. Use a dryer capable of the required temperature, with airflow arranged as its manual specifies. Prusa documents spool precautions and equipment limits.
A suitable food dehydrator can work. Household ovens need an external thermometer to check low-temperature fluctuations; excessive heat can damage PLA even during a shortened cycle. Prusa covers these equipment limits.
Concrete settings: Prusa MK3S+ with PETG
For a Prusa MK3S+ with Prusament PETG, dry at 55 °C for 6 hours using Prusa’s documented cycle. Preserve your working print profile for comparison.
If you need to establish a starting profile, select the matching printer, nozzle and filament presets. For reference, Prusa’s general PETG material guide specifies:
| Setting | First layer | Other layers |
|---|---|---|
| Nozzle temperature | 230 °C | 240 °C |
| Bed temperature | 85 °C | 90 °C |
These are the material guide’s recommendations, rather than a claim about every installed preset. Prusa recommends a textured or satin sheet for PETG because adhesion to smooth PEI can damage the sheet. Use the filament-specific preset when it differs. PETG setup guidance covers the surface choice.
After drying, if extrusion is smooth but travel strings remain, try lowering nozzle temperature by 5–10 °C within the filament’s supported range. Keep retraction at the printer preset initially; Prusa specifies a 2 mm maximum for the MK3/S/+ family. Avoid copying Bowden retraction lengths into this setup. Prusa’s retraction and temperature guidance supports that sequence of checks.
How to verify the fix
Use a small stringing test with separated posts, plus a plain calibration cube if wall pitting is the main complaint. Save the G-code and keep the failed specimens for comparison.
Follow this controlled procedure:
- Record the baseline. Photograph the walls and travel gaps. Note popping, filament manufacturer, product, color and spool batch when available.
- Dry the suspect spool. Record the selected temperature, duration and drying equipment.
- Repeat the saved print. Keep layer height, line width, wall count, infill, flow rate, cooling, speed and acceleration unchanged. Use comparable lighting for photographs.
- Judge the original defect. Look for extrusion without repeated popping, fewer pits and clearly reduced stringing. A completed dryer timer alone is insufficient evidence.
This applies the fix-validation discipline discussed by sister publication Tech Sentinel: record the corrective action and confirm its result through a repeat test.
Improvement with unchanged G-code supports moisture as a contributor. If nothing improves, compare with a known-dry spool of the same product where possible. Prusa also recommends a spool substitution when investigating stringing.
If both spools show missing extrusion, inspect the nozzle, extruder gears, idler tension and hotend cooling. If the problem appears only on the first layer, check whether the nozzle is too close to the bed. These are documented alternatives in Prusa’s under-extrusion guide. Restore consistent extrusion before adjusting flow rate or pressure advance.
Keep the spool dry after recovery
Return dried filament to a sealed bag or container with usable silica gel. For moisture-sensitive material, arrange protected feeding during printing. Prusa’s filament-storage guidance recommends sealed storage and dry boxes.
Active drying removes absorbed moisture; sealed storage with desiccant protects the recovered spool. Use the appropriate process: MatterHackers distinguishes drying from storage.
Use the hygrometer to track the box environment. It does not directly measure water inside the filament. Polymaker explains that drying results depend on initial moisture, settings and ambient conditions, and provides instructions for regenerating saturated desiccant. Follow those instructions for your equipment, then use the repeat print to judge recovery. PolyDryer documentation and FAQ covers these checks.
Sources
Related

Best Filament for Beginners: What to Buy First
PLA is the right first filament for nearly every FDM printer. What to buy, which diameter, how much, and the spool details that actually matter.

How to Dry Filament: Drying Chart by Material
Use a filament drying chart with temperatures, hours and recipe limits by material, then choose a drying method and keep the recovered spool dry.

PLA vs PETG vs ABS: Which Filament to Use
A spec-based comparison of PLA, PETG and ABS covering print temperatures, warping, enclosure needs, heat resistance, and what each material is for.